What You Need Before You Start #
Before you begin, make sure you have:
- Access to Amazon Seller Central
- Admin-level permissions (to create/manage apps)
- A basic idea of what you want: Orders, Inventory, Reports, Finances, etc.
Good news: for most seller-account use cases, you don’t need a long “apply & wait” flow like Ads API.
Where SP-API Credentials Come From #
SP-API uses OAuth. In practice, you’ll end up with:
- Client ID
- Client Secret
- Refresh Token (the important one)
The refresh token is what you store securely. Your code uses it to generate short-lived access tokens.
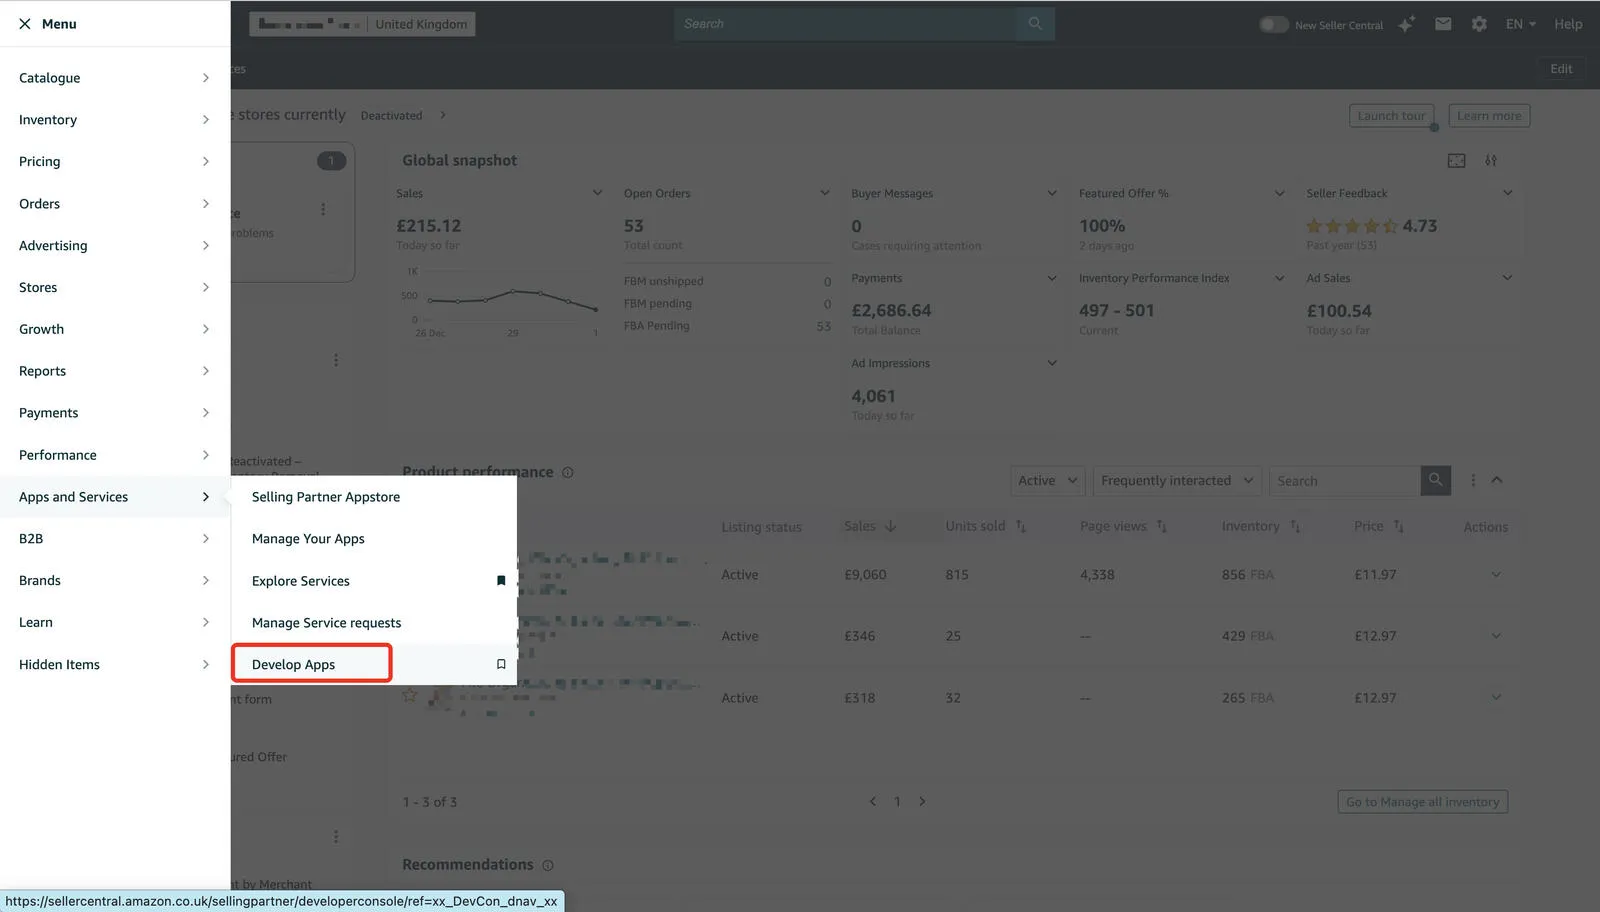
Step 1: Open “Develop Apps” in Seller Central #
Log in to Seller Central, then open:
- Menu
- Apps & Services
- Develop Apps
Step 2: Create a New App Client #
On the Develop Apps page, create a new app client. You’ll usually see an option like “Add new client” or “Create new app”.
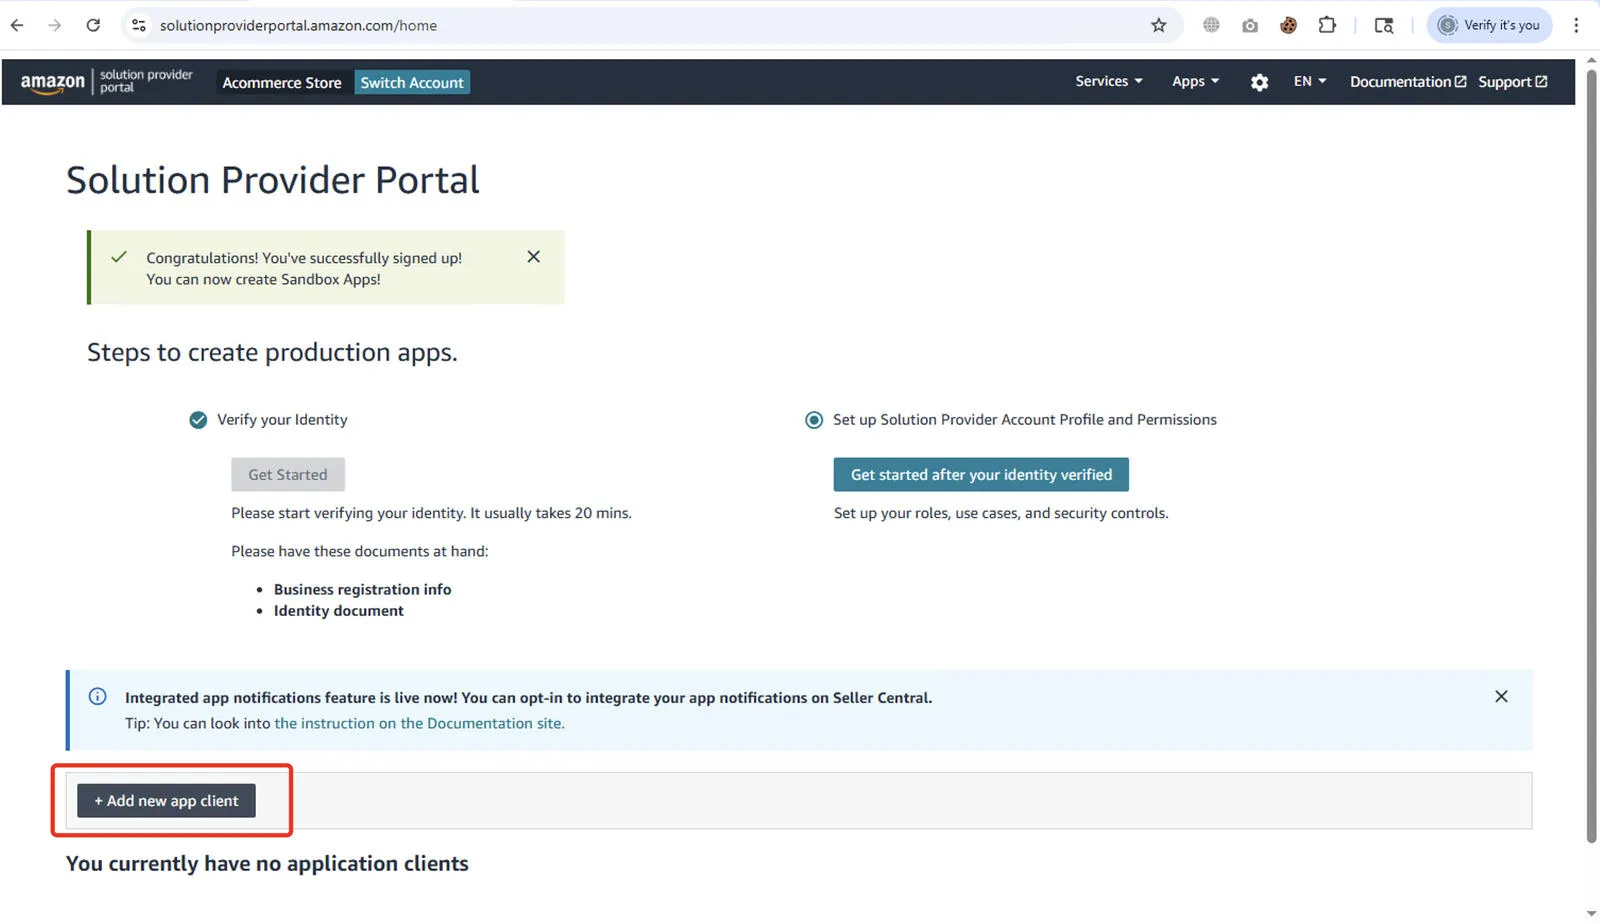
Then proceed to create the new app:
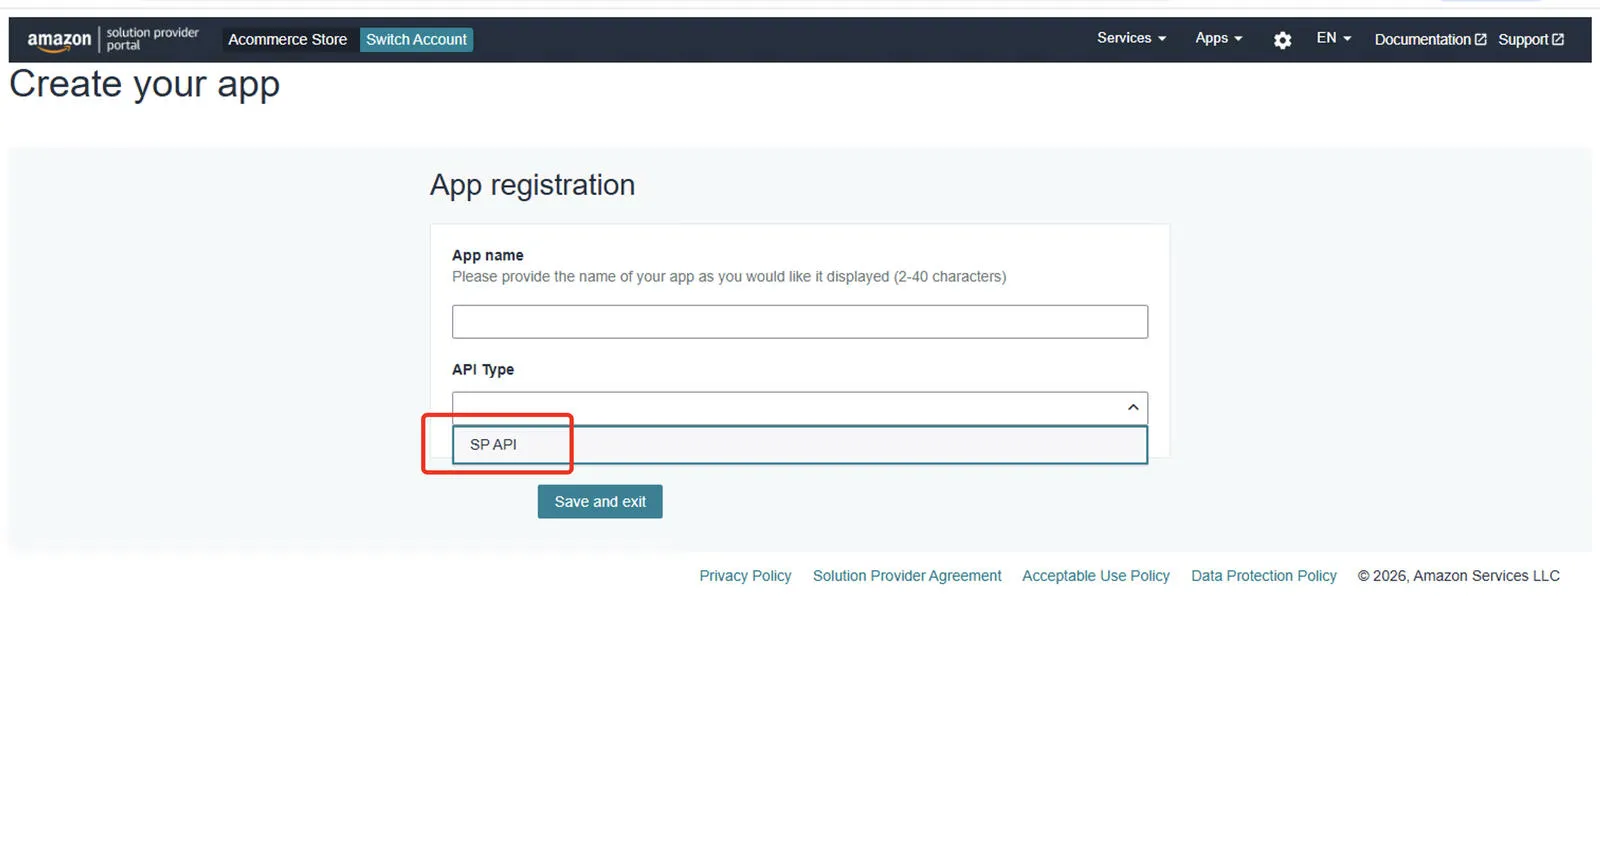
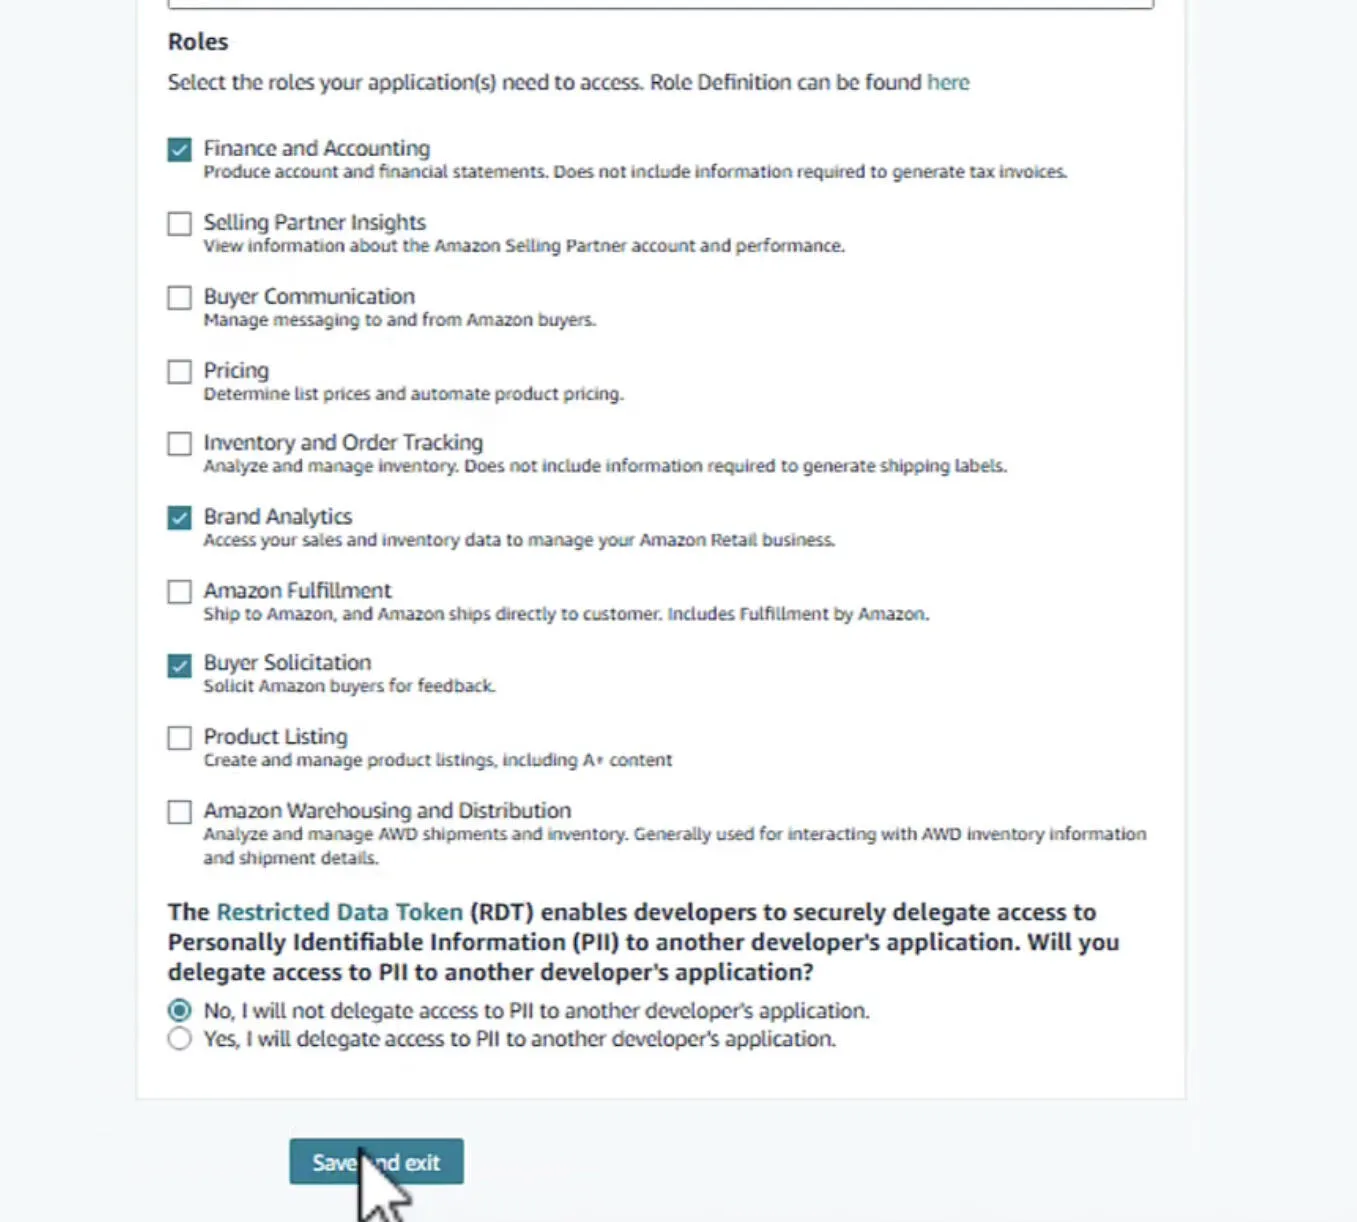
Step 3: Fill the SP-API App Form + Select Roles #
When creating the client, you’ll provide:
- App name (anything is fine)
- API type → choose SP-API
- Roles (permissions)
Tip: If you’re not sure which roles you’ll need, pick the ones you expect (Orders, Reports, Inventory, Catalog, Finances). Missing roles later usually means “access denied”.
App form:
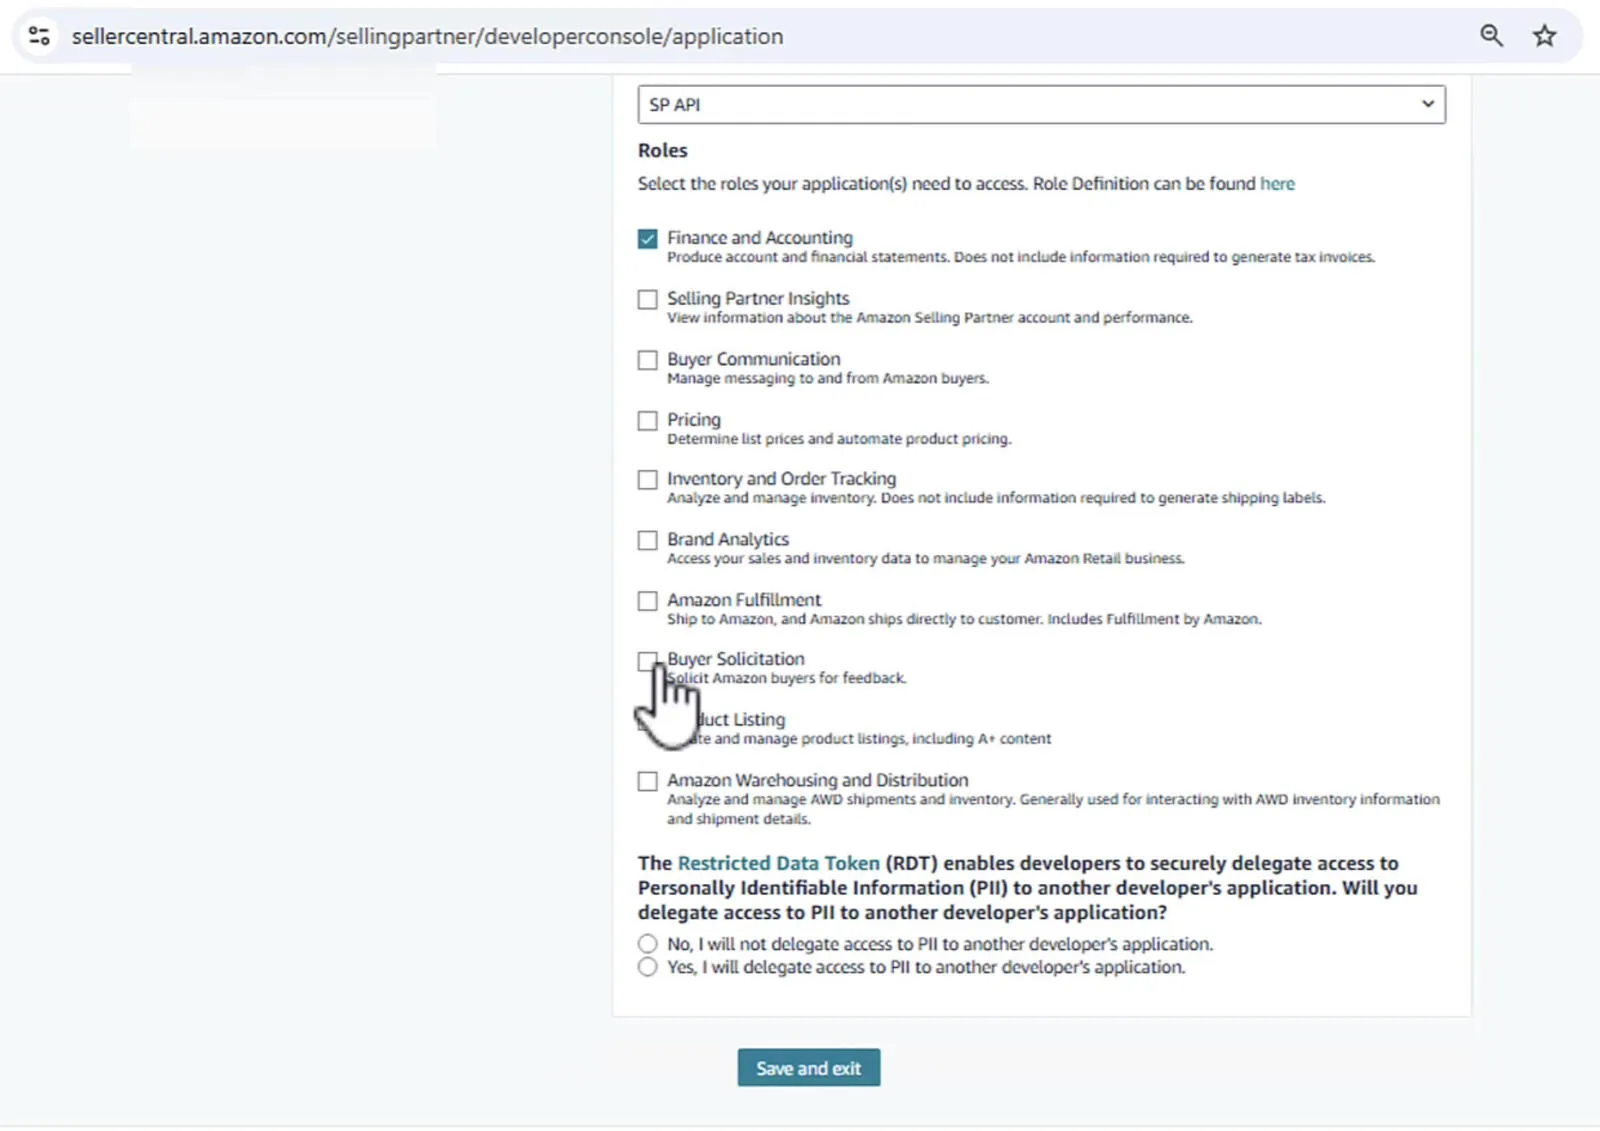
Roles selection:
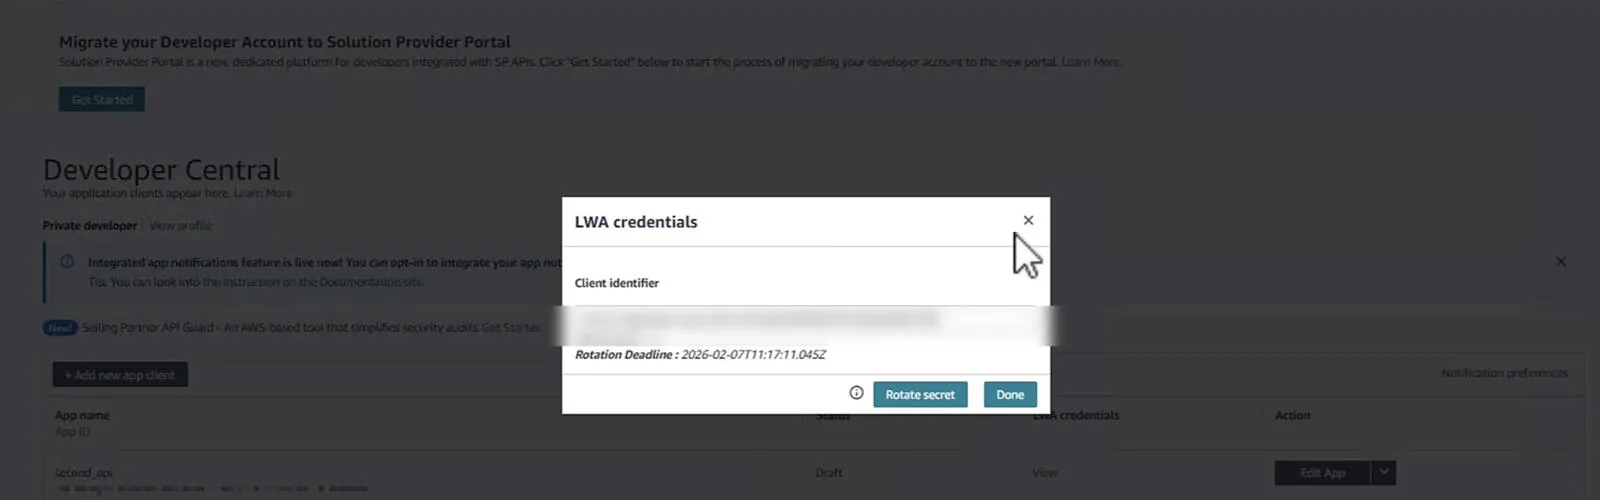
Step 4: Copy Client ID + Client Secret #
Once the app client is created, open it and copy:
- Client ID
- Client Secret
Tip: Store these securely. You can rotate secrets later if needed.
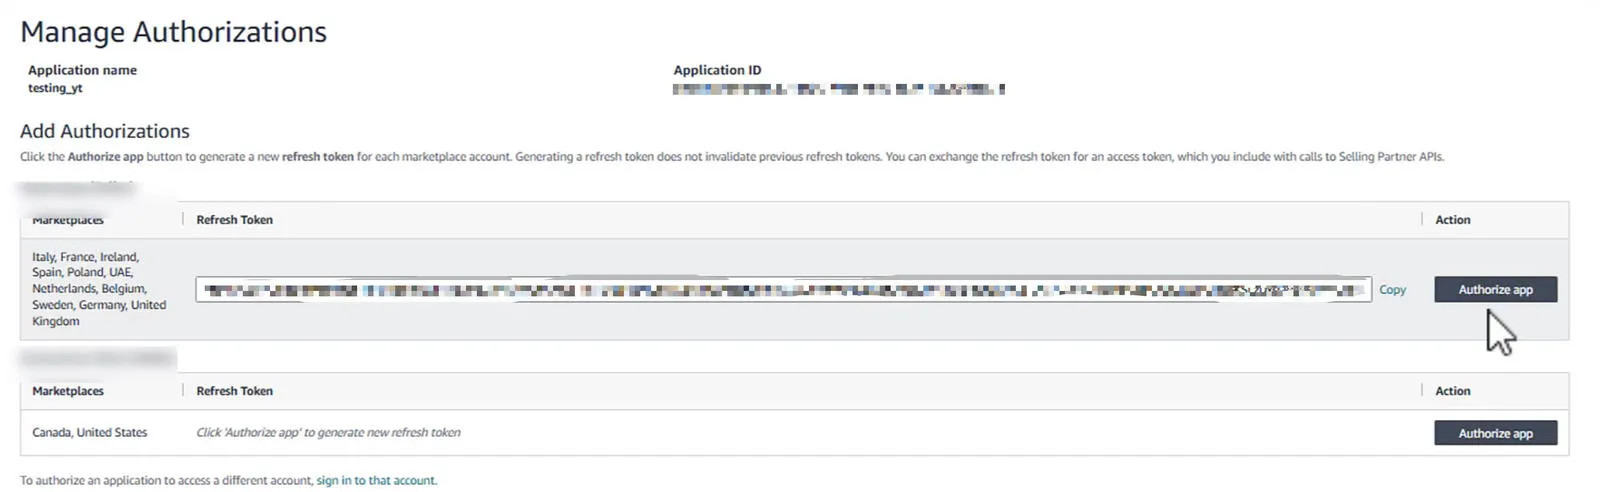
Step 5: Authorize the App and Generate Refresh Token (EU vs NA) #
This is the step people miss: even if you have client ID/secret, you still need to authorize the app to generate a refresh token.
When authorizing, choose the right region:
- EU for Europe marketplaces
- NA for North America marketplaces
Important: If you authorize the wrong region, you’ll waste hours later thinking your credentials are “broken”.
What You Should Have Now #
At this point, you should have:
- Client ID
- Client Secret
- Refresh Token
That’s the full credential set needed to start calling SP-API.
Common Issues (Quick Fixes) #
- No refresh token: you likely didn’t authorize the app
- Access denied: missing roles — edit the app and add permissions
- Wrong region: authorized EU but calling NA (or vice versa)
What You Can Build With SP-API #
Once you’re in, SP-API becomes your backbone for seller automation:
- Daily order pulls → Sheets/DB
- Inventory alerts
- Sales dashboards per SKU / per marketplace
- Reports automation
- Refunds / returns monitoring
Need help implementing this?
Tell me your stack and what you want automated. I'll reply with a simple plan tailored to your needs.